
Upgrading to a Rachio Smart Sprinkler Controller is a simple way to make your irrigation system more efficient and easier to understand. This guide walks you through the typical indoor installation process.
Tools Needed:
- Screwdriver
- Drill (if mounting on a wall)
- Smartphone for downloading the Rachio App
Installation Steps:
- Power Down: Test your system to ensure all the zones are working correctly and then unplug your existing sprinkler controller.
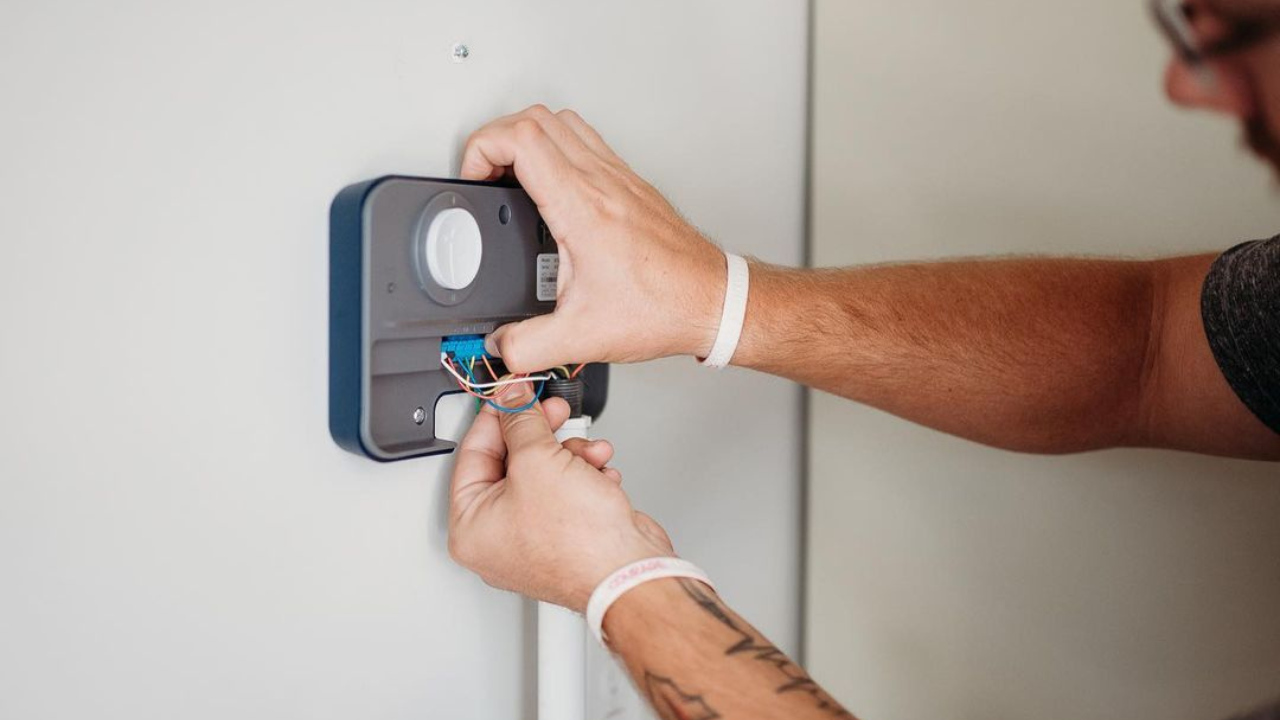
- Remove Old Controller: Take a photo of how the wires are connected to your old controller, then detach them and uninstall the old unit.
- Mount New Rachio: Use provided screws and the mounting template hang the Rachio controller on the wall.
- Connect Wires: Referencing the photo of the old controller, attach zone wires to the corresponding terminals.
- Power On: Plug in the power cord to the controller and then plug it into the wall. The light bar should light up as the controller boots up.
- Wi-Fi Setup: Download the Rachio App and create a free account. Follow the setup wizard to get connected to the internet.
- Configure Zones: In the app, set up each zone with details like plant type and sun exposure. You can take pictures of each zone for easy reference.
- Set Schedule:
That’s it, you should be all set up and ready to water!
Get the latest from Rachio
Sign up to get yard tips, product updates and promos in your inbox!